This post is a part of a series of posts for Customer Service. The complete GUIDE can be found here
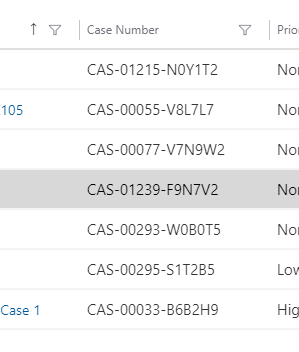
Why on earth did anyone think that this was a reasonable number to include in Customer Service cases?
This number is way to hard to relate to, and too hard to explain why came to be. It has absolutely nothing to do with the Email Tracking Token, leaving the customer utterly confused when talking about numbers.
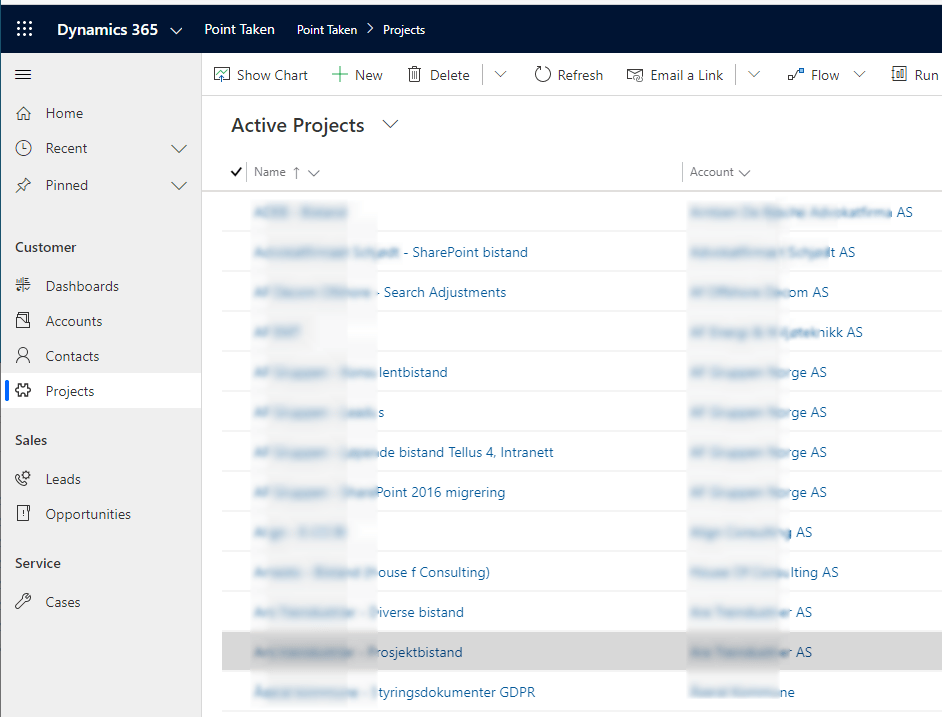
Might be a little hard to see here, but I open my solution from https://make.powerapps.com and select the case entity. In the Case entity I have the default Case Number field. When choosing to edit this field I simplify the autonumber. This will make even more sense later on.
A larger image
All of this will be included in my Customer Service Solution later on in the guide.
This post is a part of a series of posts for Customer Service. The complete GUIDE can be found here
I prefer to define a team with a security role when i create Customer Service solutions. The idea is that the incoming case is assigned to the Customer Service team. This way it is clear to see what cases are new and not yet assigned.
NB! Reassigning Cases to a new user Out Of The Box is not great. The cascading rules changes the sorting of emails because of modified on dates. I will therefore include a post on how to modify the cascading rules.
Security Role
Open Dynamics in any app and find the Advanced Settings
This will open up the good old Dynamics Setup. This is where we can access the security model.
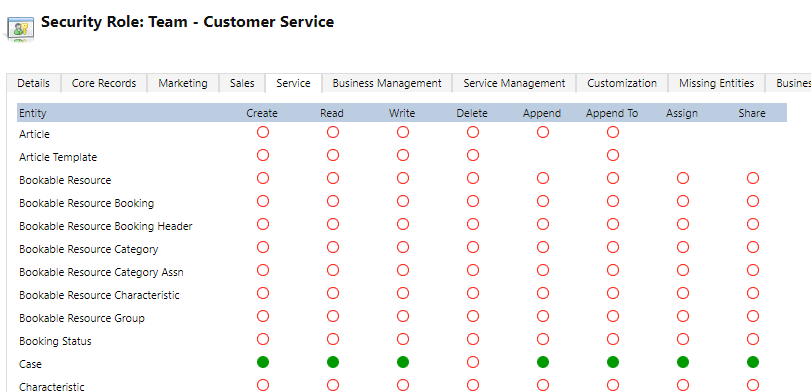
We need to create a security role for the team.
These are the entities that I needed to make my scenario work. It is a very minimal role, but I won’t be needing more than this for Customer Service Team.
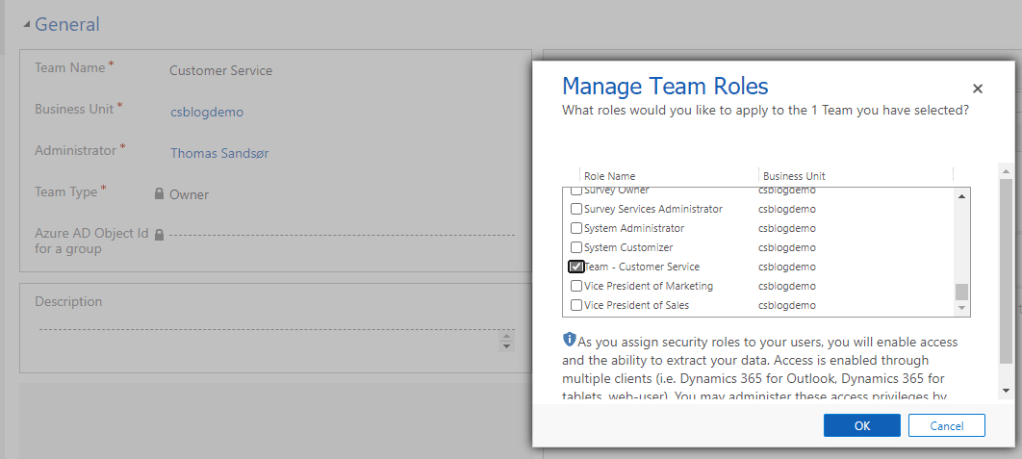
Team
Open teams and create a new team. I will call mine Customer Service. Make sure you assign the security role to the newly created team.
If you are a customer, click “no, continue signing up”. If you are a partner you should look for different places to create demos. Head on over to CDX Expereiences
It doesn’t matter what you choose here. If you ever turn this into production, the domain name will be something you can change at a later time.
Continue proving you are not a robot, and then wait for everything to finish up.
Start the setup when it’s done. Doesn’t matter what you choose in your setup of apps. It usually installs everything anyway. Eventually you will end up here, and you can open Customer Service HUB:
We have now completed the first step, and created a new trial for Customer Service.
Start “Get Free Trial”, and click the next next etc etc.
Back in the portal you want to open users, and locate your user. Choose the Microsoft E3 subscription and attach this to your contact. Remember to click “SAVE CHANGES” in the bottom when you are done.
This is a quick guide to the simplest form of SSIS import. I will not cover all of the amazing ETL possibilities you can do with SSIS, because I am not the correct person to set this up:)
The background for this post is also trying to learn the differences between DataFlow and SSIS in regards to API stats online.
The setup
Install BIDS LINK HERE – If you don’t have visual studio
The structure is very simple here. Get file, add one data column and then import to dynamics.
The flat file I am getting is a simple .csv file and you see the following columns.
Next step is a bit odd, but that’s how lookups work in SSIS. I have to create a new column that is called “account”, because i have to define the lookup type. This Derived Column does nothing else.
In the end we connect to Dynamics via the KingswaySoft connector.
I have chosen to use alternate keys. If you wonder what this is, look at my previous post about alternate keys and DataFlow.
Then I click on columns to map the fields
For the lookup we connect to ParentCustomer. Once you have mapped the field, i can choose to what field to match on the Account. I open the “…” and here I choose the primary key for account as matching. You could use whatever you want, but I have created alternate key for account on AccoundNumber.
The result
I ran this test during the night time at the same time as DataFlow. SSIS used 1 hour and 22 minutes for the exact same file, and that is fine by me. There are so many different variables in online load times, that 20 minutes doesn’t really prove anything.
What about the API?
I wrote a post about DataFlow and API. Mostly because I was curious about the analytics within CDS. I don’t understand the numbers i see, so I have written to Support about the numbers. What I heard back was because of the batch of records being entered, this should be about right…
If this is correct, SSIS is a lot more efficient in the API calls to Dynamics, but took more time in this one single test i performed.
SSIS = 3,501 API Calls DataFlow = 13,544 API Calls
This blog post is step 3 of the Data Flow setup in combination with On Premise Gateway. In the last post in imported all of our ERP accounts to the CDS database. Now I wanted to import all active projects, and connect them to the the Accounts in CDS. There are a few odd things you have to do in the setup to make this work, but I will try to outline this without being to detailed..
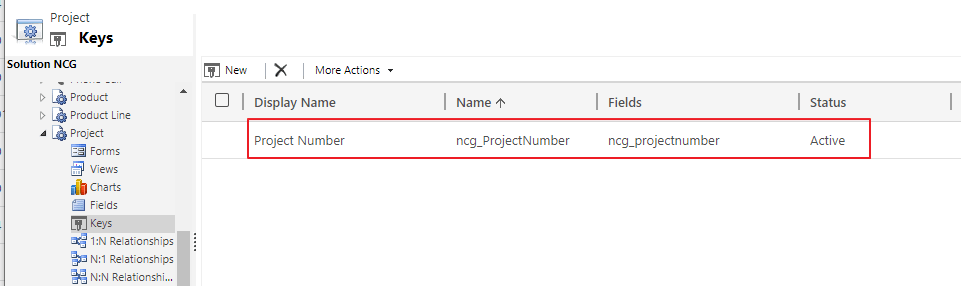
First off we need to get familiar with the Alternative Keys in Dynamcis. In Account I created alternative key for AccountNumber. I need to do the same for Project.
The field is also represented on the form. I choose to keep these as “Single Line Of Text”. Just keep it simple, because this doesn’t need to be advanced.
This is important so the import is able to match every time runs. Remember that the Data Flow is doing UPSERTS. It will create a new record if it can’t find the project number. Imports CAN’T connect to GUID’s because my ERP system does not have the CRM GUID.
Make.PowerApps.com
The most important thing you do here, is make sure you have the correct environment!! 😉
If you don’t understand this setup, look at my first blog about the DataGateway
The important pieces of information here are: * Project Number * Project Name *Account Number
This is all i need to create a project in CRM and connect it to the Account
Connecting to Lookup
This is where you need to pay close attention. First you choose the project (or other entity) from a list of existing entities. The Alternate Key will display if you have done this correctly. If nothing is there you have to go back and start again with alternate keys
There are 2 lookups on project. Account and Contact. Account has 2 alternate keys, and Contact has 1 alternate key.
Account:
Contact:
This is why you will see 3 fields in the beginning of the mapping 1. ncg_Account.AccountNumber – Account looup identifier 2. ncg_Account.ncg_POAccountNumber – Accound lookup identifier 3. ncg_CustomerContact.EMailAddress1 – Contact lookup identifier
I am using the AccountNumber for a different purpose, so let’s just forget this one for now. I am using the Account Number from ERP to the ERP field on the Account entity to create a match.
Schedule
After you have set a schedule, you should see the results in CRM:) In a later post I will tell you why I am connecting the project records to dynamics. A quick hint, Forms PRO and NPS!
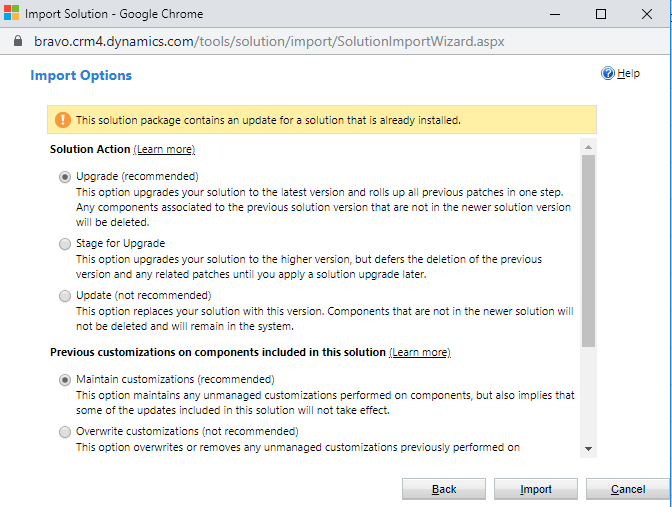
I haven’t touchet managed solutions for quite some time, so importing a managed solution recently surprised me:)
This article is not explaining the differences in detail, but I wanted to make sure you knew there is a difference between upgrade and update. I don’t understand why Microsoft insist on recommented the way they do. I feel you need to know the project before this is a certainty.
Upgrade
New for me is the option of upgrading. If you remove an item in the source managed file, this will now actually delete it in the destination. Say you remove a field on account this should remove the field in the destination.
A great way to test something before committing to any changes. I would not use this for an ISV solution, but if you happen to use Managed internally this might be a way to go.
Update
This is marked as the Not Recomended option, but I still feel this is the normal way to do. If you are doing an ISV import this doesn’t matter because the solution file probably is correct, but if you are working with managed internally, I would use this just because I might not trust someone in dev doing config 100% correctly…
I was never a fan of the Business Process Flow (BPF) because of the many flaws. Sometimes I didn’t think it was easy enough, and other times not advanced enough. It simply wasn’t what I needed.
In a recent project I decided to give it another go, because the customer wanted to continue with the BPF they had from their old CRM system.
Opening the PBF now I see that there is so much new features here that I haven’t seen before. I guess most of these features are due to the FLOW platform now taking over the BPF.
Challenge: Setting pipeline phase
I know you can report on the BPF entity, but that is more complex than reporting on the opportunity entity if you ask me.
Can I set the “Phase” field on the opportunity when navigating to the next step in the BPF? Let’s see!!
I wanted to set the Pipeline Phase with BPF
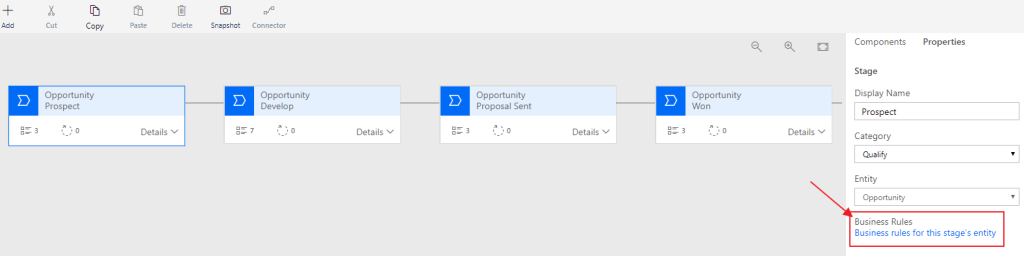
Config
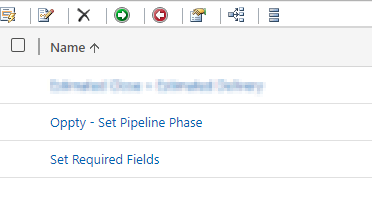
Open the Business Process Flow from your solution and notice a button at the bottom right “Business rules for this stage’s entity”.
Create a new Business Rule for Opportunity “Oppty – Set Pipeline Phase”.
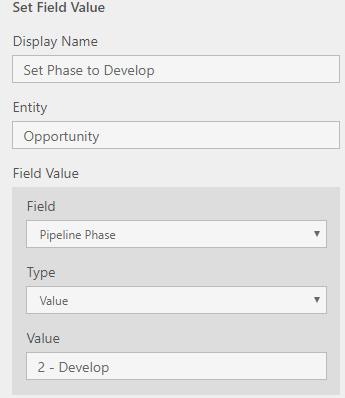
For the first condition we check if the BPF is in the stage named Prospect.
If true, set the Pipeline Phase to “1 – Qualify”.
Repeat for the second step!
The business rule should look something like this:
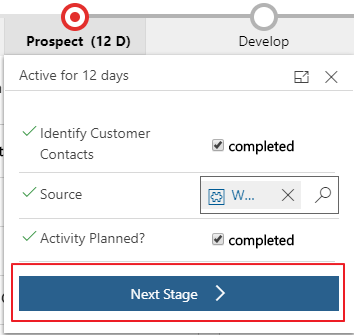
Result
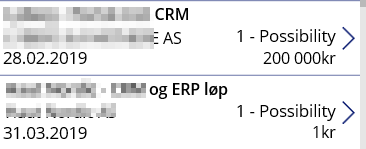
Let’s get back to the Opportunity. We see that it default is active on the Qualify stage in the beginning of the sales process.
Click the next stage
And there you go!!
New Found Love
So what do I think of the BPF now? Honestly, I liked it. It might be a replacement for many other JavaScripts that I have been using the later years, and that is only a good thing. In this case I was able to skip JavaScript and therefore deliver a solution with a low technical footprint:)
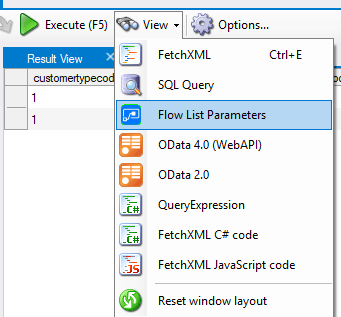
This week I needed to use the List Records function, and I realized that I had no idea how to use the filters. Thank you Jonas Rapp for creating the FetchXML Builder!! The function “Flow List parameters” saved my day:)
Simple filters
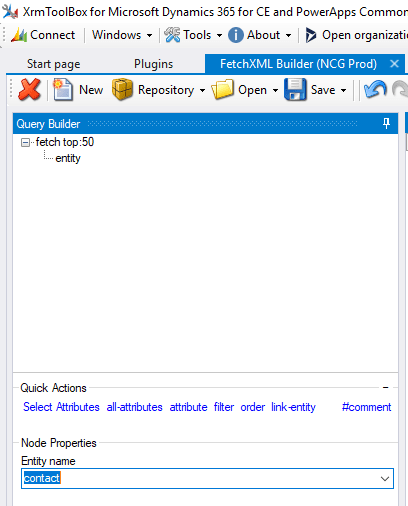
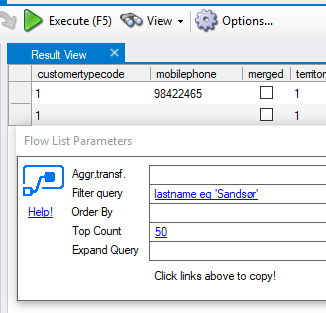
Let’s begin with the simple filters where I get a contact with the last name of Sandsør
Test your search result with the Execute button so see that anything is actually returned. Then open the Flow List Parameters
The tool converts the Fetch XML, and magically gives the correct filter to add in our FLOW query. It can’t get much simpler than that!!
Lookups
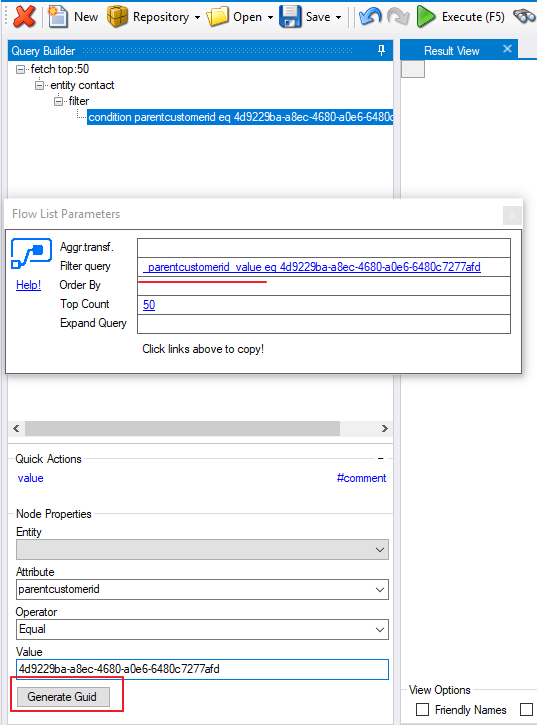
Lookups act a little bit different with the syntax, as lookups always to. This got me quite confused before finding this tool, because I was not getting match to my result.
I am searching for contacts with a given GUID. In my case I didn’t know what the GUID was, so I randomly generated a GUID for the formula. In FLOW I substituted the GUID part of query with a dynamic variable.
Filter Query with lookups, you need to add “_” as seen above. When working with lookup you won’t get at match without the “_LookupField_Value”.
Filter linked entity
The last filter is a little more complex, and might not get used due to some limitations of Odata (Must match on unique ID for related).
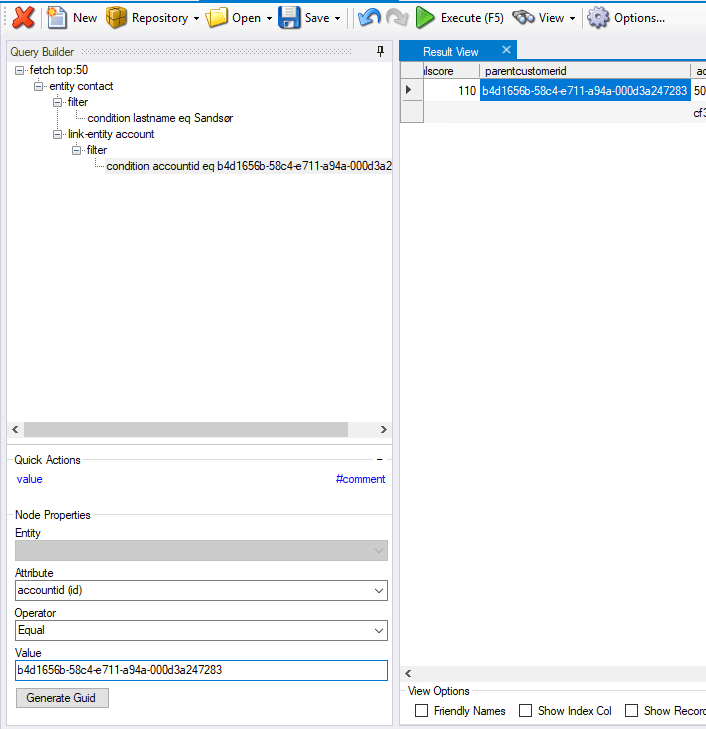
In this scenario I wanted to locate all contacts with last name “Sandsør” where the regarding accountID = GUID.
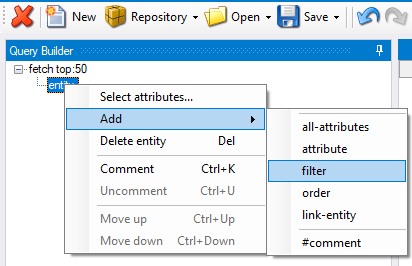
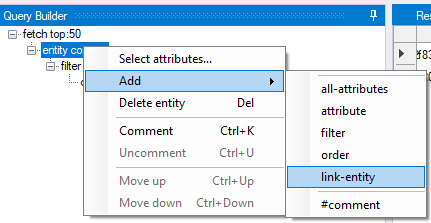
Choose the main entity on top, and add “link-entity”
Make sure you have the correct relationship here. Some Lookups support more than one entity, and therefore you make sure you have the correct one.
Again we find the magic with the “Flow List Parameters“.
In this scenario we also get Expand Query result that we need to copy/paste.
Apply to Each
Once you have figured out what filter to use, you can select the “Apply to Each” function, and add custom logic in here.
So far I feel that currency formatting in PowerApps seems to be a little troublesome. Sure everything would be great if we all sold in $ and our offers were all huge! All of the examples out there are based on this. I needed to represent values at 1 NOK and up. In Norway we don’t use “,” for separating thousands.
I am sure there are simpler ways of doing this, and I am hoping someone can fill me inn:)
For me I need to format PowerApps currency NOK. I have tried manipulating all of the above with no luck at all. Have no idea what I am doing wrong, but that doesn’t matter. I finally found one that worked for me
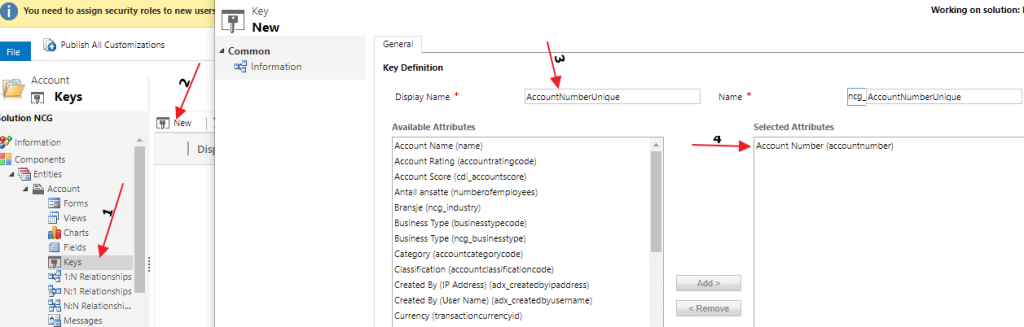
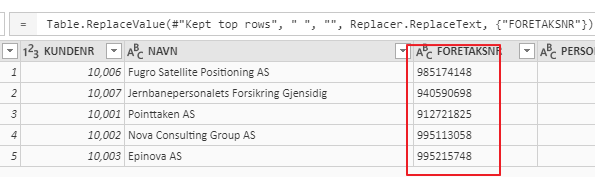
We need to do one config in CRM/CDS before we continue. For the integration to work we need to create a KEY for it to match on. The source doesn’t know of GUID, so I create a key for “Account Number”. In Norway we are lucky that this number is unique and applies to all organization’s.
Open the entity you are integration to (Account for me), and create a new field called KEY. I am choosing to use the “Account Number” field here as my Unique KEY. Remember to publish changes!!
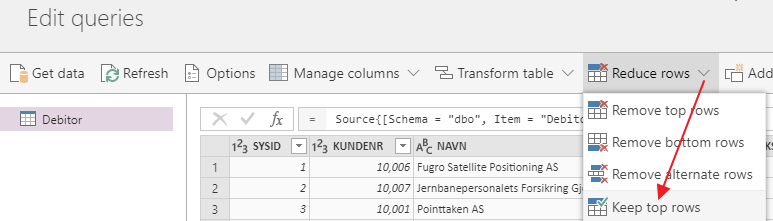
First thing I do is limit the number of accounts while testing.
Then I remove all the blank fields in the KEY, to make it equal to the user input in Dynamics. You don’t have to do this, but chose to for simplicity.
In the next step you choose the entity to connect to in CDS/CRM, and map the field. I am choosing to only map “Name” and “Account Number” during the test.
And the magic continues. Here you can setup how often you wan this awesome sync to happen. Our data is fairly static, so once a week is fine:)
Wait until the query is done, and check out the newly created/updated Accounts in Dynamics. This is just a gamechanger for me.