DataFlows – Set Customer lookup

I still don’t know if this is local to my tennant, but I have tried in 2 different orgs, and I always get an error with Customer field for Contact. This post is almost identical to the Set Parent Lookup, but there are some differences in the end.

Setup Contact

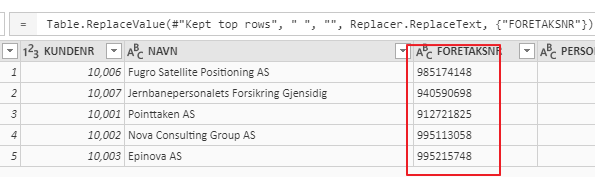
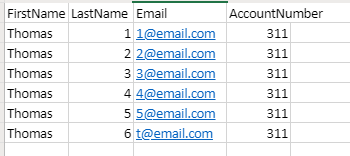
I have one Excel file with 6 contacts. They are linked to the account with number 311. The unique identifier I have on contact is email.

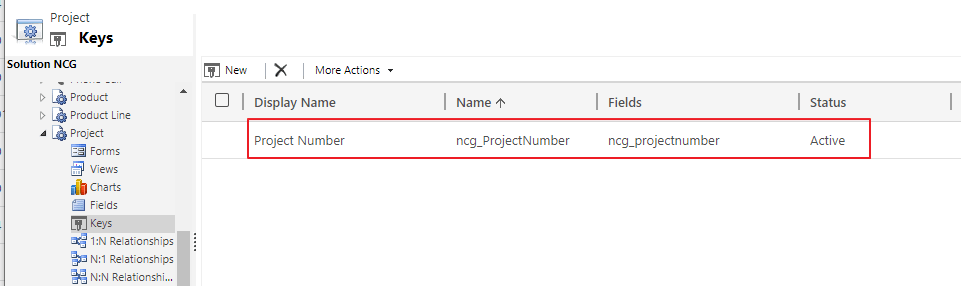
I setup a key for email on contact, so that the system will understand what to write to.

Setup Account

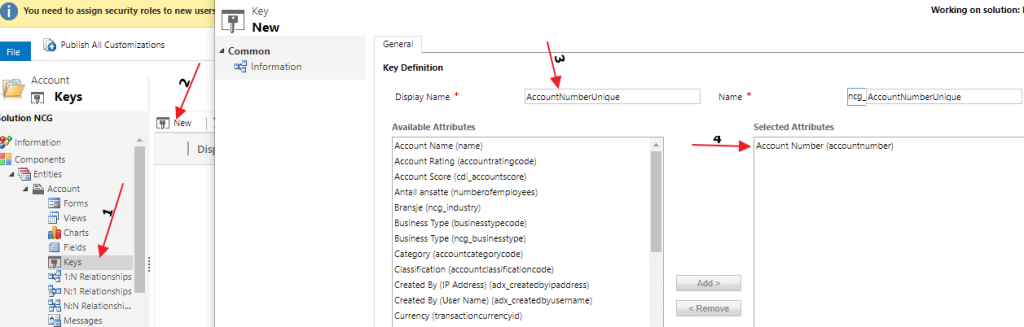
On the Account I have 2 fields for number matching, because I have different systems that integrate, but it doesn’t matter in this case. PO Account Number is what we are going to use, and I will try to explain why (based on my findings).

PS: Both Account Number and PO Account Number are Alternate Keys on Account!!

Setup Data Flow

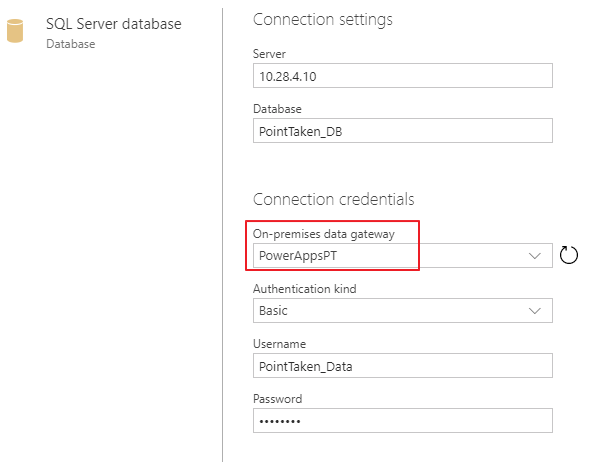
Go to https://make.powerapps.com and start a new Data Flow project. In this case I am choosing the Excel file for simplicity. I have uploaded the Excel file to One Drive, so that it is available at all times online.

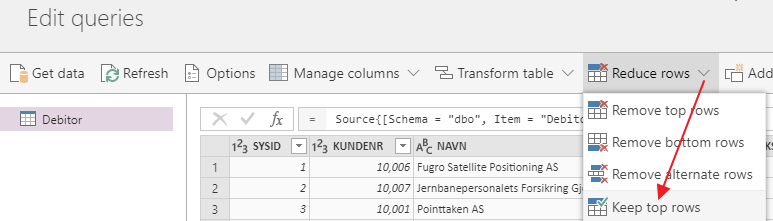
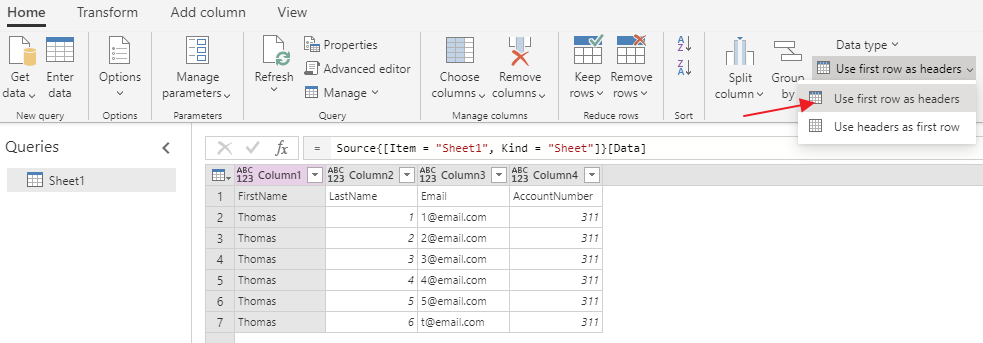
In the Excel file I had to make sure that the first row was headers before i continue

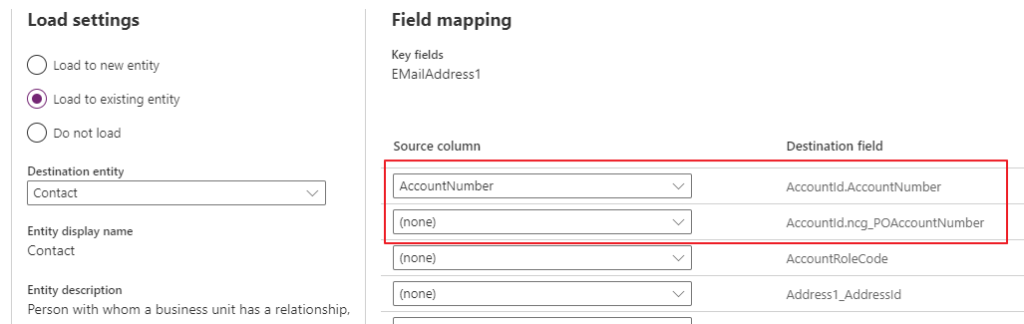
During the mapping I will see both the Alternate Keys I have for account. Normally you probably only have 1 Alternate Key for Account, but my setup requires 2 because of 2 different systems integrating against 2 different numbers. For blog i am using value 311, so it doesn’t really matter here.

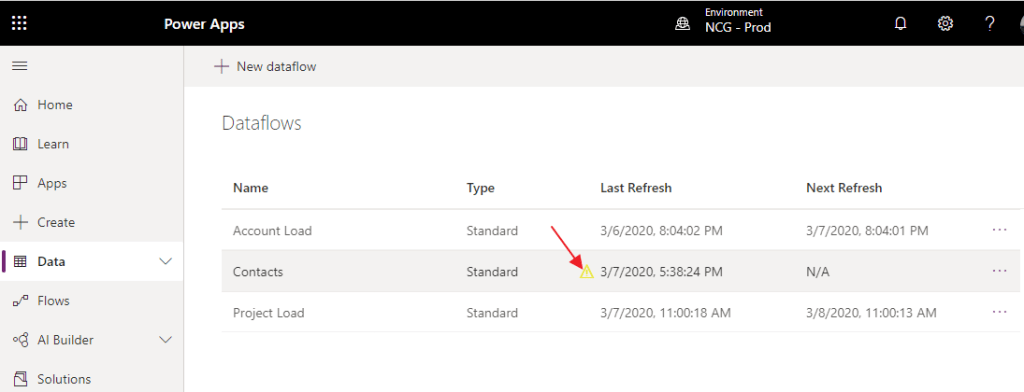
When done mapping Account Number (again it doesn’t matter if I choose one of the other) continue to the next step. I choose a manual refresh, and it get stuck here.

You will also see an error in the data flow projects.

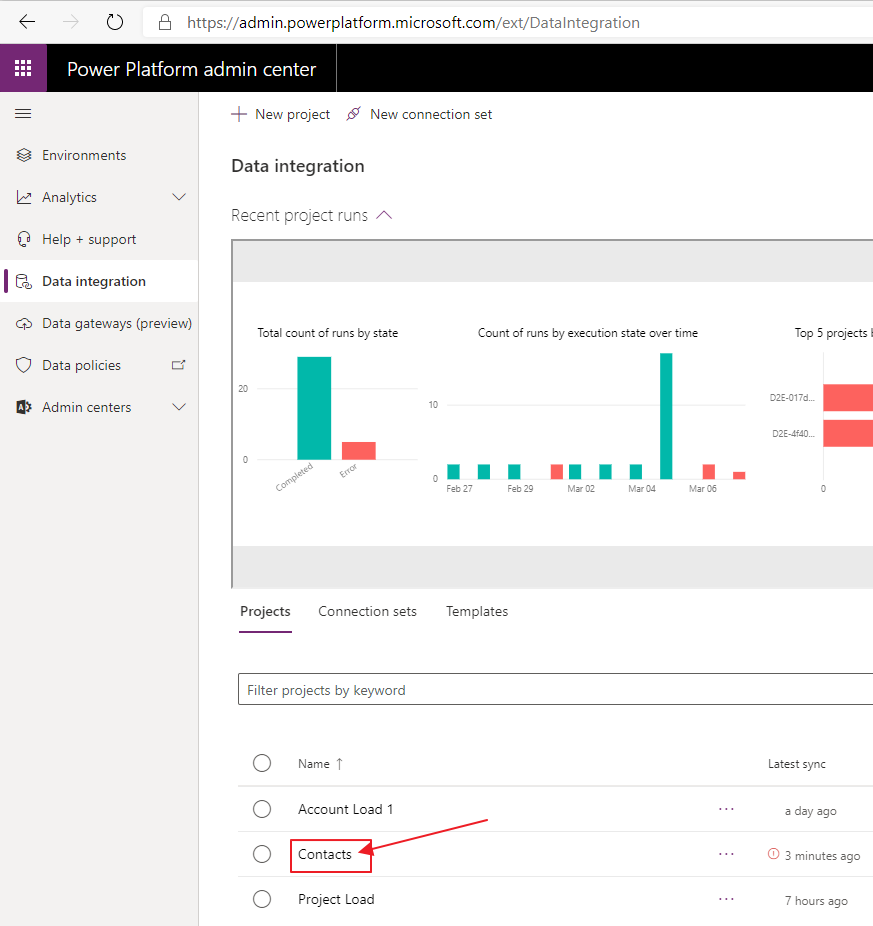
https://admin.powerplatform.microsoft.com

Open data integrations, and open the one that failed.

From here you can open the mapping table

This is where you most likely will see a missing mapping. For some reason it cancels out my mapping. I have tried this in 2 environments and same issues. Every time i choose the Customer Lookup i have this problem.

Click on the destination field, and navigate WAY to the bottom.

This is where I believe the bug is located. Data Flows happens to be sensitive to what Alternate Key was created last. This key is the last thing that I published on Account, and therefore it is in the list. If you only have 1 alternate key, this will show.

Again, it doesn’t matter in this demo because i have 311 in both KEY fields.

The Work Around

After you save the changes, open Data integration. Here you will setup a schedule to run from the admin.powerplatform.microsoft.com.

Click save schedule and wait for it to run.
PS!! Remember to stop the schedule when done!

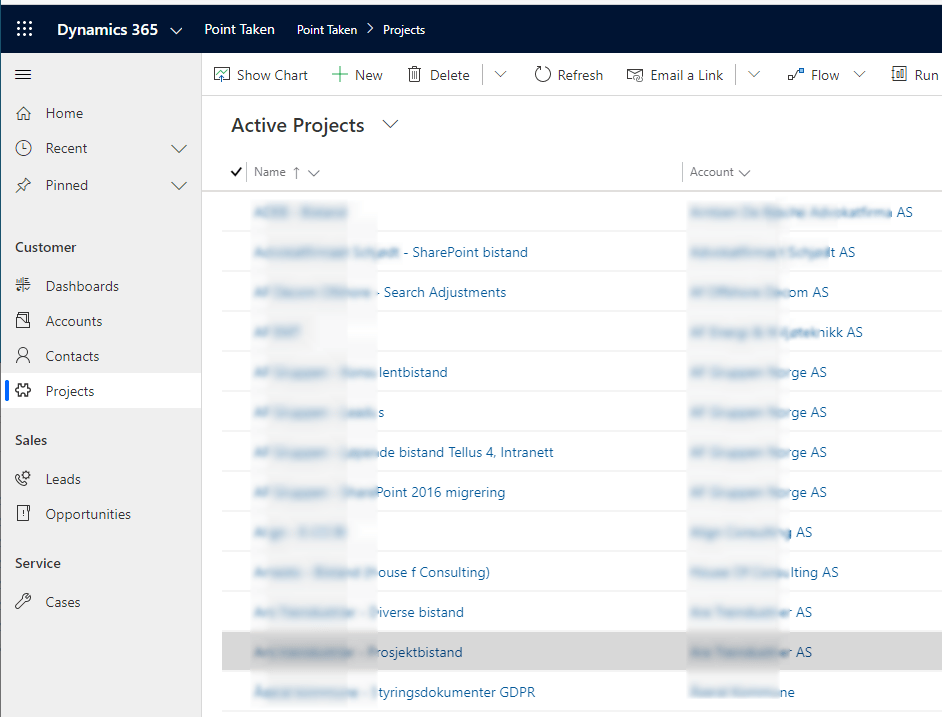
For the Final result you will see 6 contacts connected to the Account

Next up is how long does it take to import 94000 contacts to CDS via Data Flow!

DataFlows – Set parent lookup

This blog post is step 3 of the Data Flow setup in combination with On Premise Gateway. In the last post in imported all of our ERP accounts to the CDS database. Now I wanted to import all active projects, and connect them to the the Accounts in CDS. There are a few odd things you have to do in the setup to make this work, but I will try to outline this without being to detailed..

First off we need to get familiar with the Alternative Keys in Dynamcis. In Account I created alternative key for AccountNumber. I need to do the same for Project.

The field is also represented on the form. I choose to keep these as “Single Line Of Text”. Just keep it simple, because this doesn’t need to be advanced.

This is important so the import is able to match every time runs. Remember that the Data Flow is doing UPSERTS. It will create a new record if it can’t find the project number. Imports CAN’T connect to GUID’s because my ERP system does not have the CRM GUID.

Make.PowerApps.com

The most important thing you do here, is make sure you have the correct environment!! 😉

If you don’t understand this setup, look at my first blog about the DataGateway

The important pieces of information here are:
* Project Number
* Project Name
*Account Number

This is all i need to create a project in CRM and connect it to the Account

Connecting to Lookup

This is where you need to pay close attention. First you choose the project (or other entity) from a list of existing entities. The Alternate Key will display if you have done this correctly. If nothing is there you have to go back and start again with alternate keys

There are 2 lookups on project. Account and Contact. Account has 2 alternate keys, and Contact has 1 alternate key.

Account:

Contact:

This is why you will see 3 fields in the beginning of the mapping
1. ncg_Account.AccountNumber – Account looup identifier
2. ncg_Account.ncg_POAccountNumber – Accound lookup identifier
3. ncg_CustomerContact.EMailAddress1 – Contact lookup identifier

I am using the AccountNumber for a different purpose, so let’s just forget this one for now. I am using the Account Number from ERP to the ERP field on the Account entity to create a match.

Schedule

After you have set a schedule, you should see the results in CRM:) In a later post I will tell you why I am connecting the project records to dynamics. A quick hint, Forms PRO and NPS!

On-Premise Data Gateway integration

My state of mind at this moment is hard to describe, but Malin Martnes sendt me this link from Urban dictionary 😂

This is Part 2 of the Gateway SETUP

The final settings

This is where we left off in the last post:

We need to do one config in CRM/CDS before we continue. For the integration to work we need to create a KEY for it to match on. The source doesn’t know of GUID, so I create a key for “Account Number”. In Norway we are lucky that this number is unique and applies to all organization’s.

Open the entity you are integration to (Account for me), and create a new field called KEY. I am choosing to use the “Account Number” field here as my Unique KEY. Remember to publish changes!!

First thing I do is limit the number of accounts while testing.

Then I remove all the blank fields in the KEY, to make it equal to the user input in Dynamics. You don’t have to do this, but chose to for simplicity.

In the next step you choose the entity to connect to in CDS/CRM, and map the field. I am choosing to only map “Name” and “Account Number” during the test.

And the magic continues. Here you can setup how often you wan this awesome sync to happen. Our data is fairly static, so once a week is fine:)

Wait until the query is done, and check out the newly created/updated Accounts in Dynamics. This is just a gamechanger for me.

Pricing (a little uncertain)

As far as I can see/understand, this is using Azure Message bus, and it prices everything to messages pr hour. Below is a snipp from https://azure.microsoft.com/en-us/pricing/details/service-bus/ In my case this would practically be “free”.

Basic
Operations$0.05 per million operations
Standard
Base charge 1$0.0135/hour
First 13M ops/month Included
Next 87M ops (13M–100M ops)/month $0.80 per million operations
Next 2,400M ops (100M–2,500M ops)/month $0.50 per million operations
Over 2,500M ops/month $0.20 per million operations

On-Premise Data Gateway setup

So the On-Premise data Gateway itself might not be the most awesome thing in history, but in combination with the data integration of PowerApps it is just incredible! Carina wrote about this earlier, but I had to see it for myself 🙂

My example is based on the need to integrate my On-Prem ERP (SQL) server with Dynamics 365 online (aka PowerApps).

This method does require that you have username/password credentials to a view in SQL that will allow you to read data. After the setup, Part 2 – Final Finnish.

I need data from On-premise to Online

I needed to integrate my ERP system (On-Premise) to D365 in the cloud. There are several ways to complete this normally with code, SSIS, Scribe etc. I wanted to learn what the PowerPlatform was capable of.

I am not a developer, so I am always seeking for solutions considered No-Code, Low-Code. Integrations was something I always had to involve developers to complete.

Until now!!

Installing software

Install latest Onprem Gateway software – Be sure to update this from time to time due to function/feature/security updates from Microsoft.

The software should be installed on a server, because of the need for 24/7 uptime. While testing, you can easily install the software on your personal computer as long as it is in the same network as the SQL database you are trying to connect to.

Open the software, and set it up. I chose to use my login credentials for this action. These credentials where also the ones that were “creators” in Dynamics.

Remember the Gateway Name and Password

When this is done you should find the Gateway in your PowerApps.
NB!!! It will only install under the Default instance for now!!

Check connection with PowerApps

Last step is to open up your browser to PowerApps and see if we can retrieve the data. Open PowerApps

Make sure you navigate to the Dynamics Production environment

Then you open a new integration project

From here you connect to the On-Prem SQL DataGateway.
Don’t worry, the credentials and IP are not real here:)

So the important thing on the next step is to use the credentials for your SQL server. These credentials only need to be read from a database. This means that you might have to ask someone to create read credentials for your database.

Choose the tables you want to sync. Debitor is Accounts in our ERP system.

If you are lucky, you will see the following result!! You are now one step closer to actually complete a NO-Code integration with an onprem SQL server.

HOW COOL IS THAT!!!!!

Part 2 Final Integration