Launching a new app or launching a new CRM system always leaves the users with the same question. Where do I find the application? At first I didn’t really understand the question, because I thought it was natural to bookmark the URL to your application ie https://www.company.crm4.dynamics.com/***** etc.
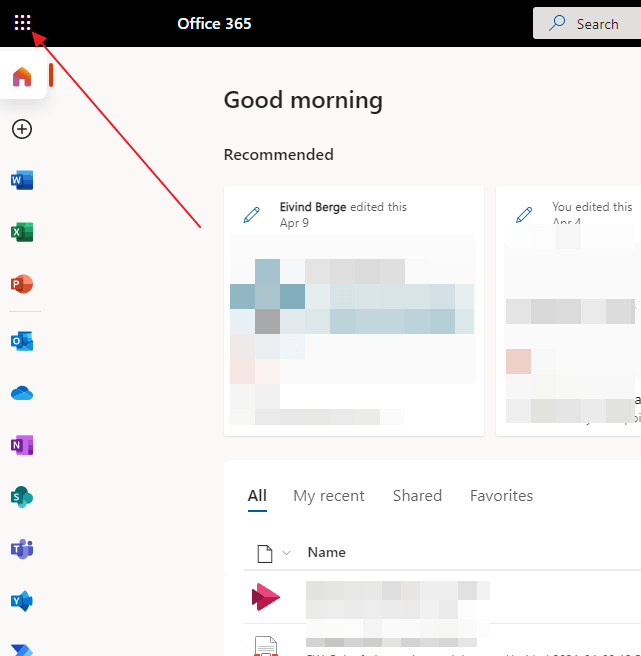
Eventually I realized that most users are actually using the waffle menu in office 365 when navigating to applications that they don’t use continuously.
They were expecting to see the application in the list when you clicked the waffle menu, because this would save them time.
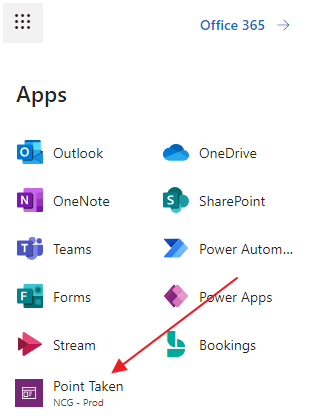
Luckily this is not a problem 😊 Open the all apps, and locate the app you are looking for
And just like that you now have a quick navigation to your CRM or Power App application in the Microsoft 365 app launcher👊
This post is almost not relevant any more due to the fact that we all will be pushed into the make.powerapps experience in “the fullness of time”, but I will still be using the classic viewer for the foreseeable future 🙂
From time to the images can get distorted due to unknown reasons. This is not a big deal as the buttons still work, but can be annoying for the users. You might have seen this in the 2 places:
There seem to be several ways to solve this issue, but not all seem to work the same. I have seen some options describing a cache clear in the console of the browser, but for some reason none of those worked for me. Lately I have had to open the developer tools and delete a bit more manual.
Click F12 in the browser where you see the error
Open the Application tab on the dev tools
Clear or delete anything within the storage related to dynamics.
Try to restart the browser, and hopefully that should do the trick:)
This is not the average Dynamics CRM post, but I was challenged by Malin Martnes to see if we could integrate the competency part of of Dynamics HR with Customer Engagement. The reason we wanted to look into the matter was because we thought it would be really easy!!! Turns out we were wrong.. hehe 😂
The first thing we did was figuring out what tables were accessible in the CDS integration. At the time of reading the blog, the number of entities was not a lot. The ones that I needed were not there. The complete list of tables that write directly to CDS can be found here: https://docs.microsoft.com/en-us/dynamics365/human-resources/hr-developer-entities
A lot of fields available, but just not the ones regarding competency.
What to do?!?!? Docs to the rescue !!
Thanks to a link from DOC’s I learned that Finance and Operations has a link to export data. You can choose whatever dataset you want, and export it to file. This has actually nothing to do with HR, but is a feature from Finance and Operations.
So I followed the blog but I used Flow instead of Logic Apps.
First start off by creating an export function in HR. Whenever this is called, it will answer your call with a file.
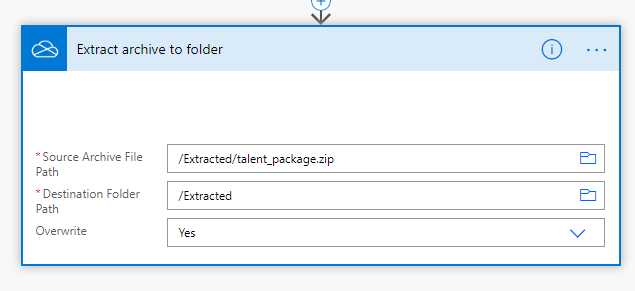
The flow looks like the logic app in structure, but I do a little extra in the end to extract the .zip file to excel.
The first hard part was actually finding the URL for HR. If you ask me it’s quite hidden. I had to have some help from Malin to figure out what my URL to the environment was.
The “Export Workers” has to be identical to the name of the export package. Then you have to decide what the name of the file I wanted to export was.
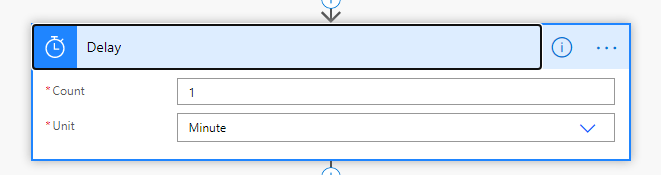
The delay is there because the service can sometimes use a little time with the response. Just let it work:)
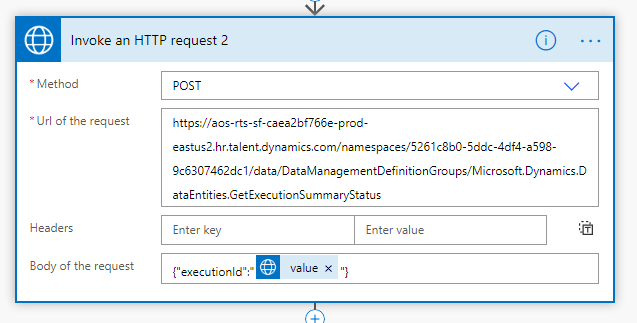
This part of the flow was just to see if .zip file had been completed. When it was complete, we could get the actual package.
At this point I had absolutely no idea what I was doing, but it was working. The body of the HTTP GET function returned a .zip file. This I could create directly in a OneDrive connector.
The last step was then to extract the file from the .zip, and voila. I now had an automated Excel export from Dynamics HR.
For the last part I could simply connect a DataFlow for importing to Dynamics:)
Was there even a point to this?
Well.. Yes, and no.. The positive thing about this was learning that Finance and Operations has an export function that I could use for extremely simple integrations. This I might be able to use at some later timer.
Did you know that it is possible to setup a fully functional Customer Service installation in less than one hour?
I am proud to present all 3 parts 1. The community solution – Download 2. The Video for installation 3. The Video for demonstrating the product
I have put a lot of hours into this configuration, because I wanted other consultants to see how nice and easy Customer Service could be delivered. I have been using countless hours every time I wanted to show a new demo, so I finally put in the extra work to make it complete. This will hopefully save you a LOT of work next time you want to demo Customer Service, or deliver a good solution to your customer.
1. Download
Go get my free community solution for Customer Service.
This is a showcase of how I would demo the solution. Find your own pitch and make yourself comfortable with it. Just make sure you have good demo data!! Good Luck 😀
This weekend I was so fortunate to talk at the Field Service BootCamp. I have tried to design the Field Service solution to be as simple as possible. I remove most of the logic from view, but keep the essence of the process. What do you think?
This video is how I demonstrate the Customer Service solution based on my blog series. I like to keep things simple, but at the same time functional. Please let me know what you think.
Stay tuned
Next video will be “how to install the solution” from scratch, so you can try it out yourself😀
This is the last post in a long series about Customer Service and Dynamics 365. After several implementations over the years, the following configuration should be a great place to start.
Before we get started
Fire up a new trial of Dynamics with Customer Service, and add an office 365 trial to the same instance. I will not be going in depth on how to create a trial. Navigate here if you need tips
NB! for some steps you need Global Admin privilege
1. Exchange
The first step we need to do is setup a Shared Mailbox in the admin for O365. Navigate to https://admin.microsoft.com <- Make sure you are on the correct org when doing this.
When done you should se the message above. You now have successfully created a new email address for Exchange.
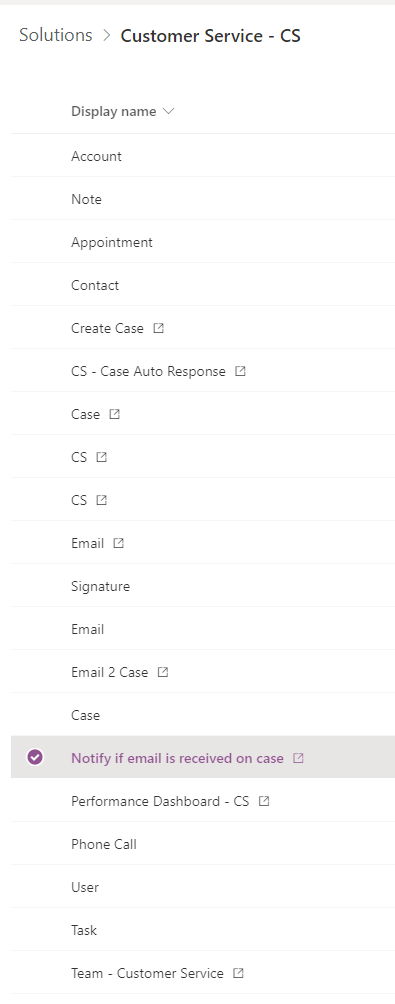
In the video I will explain why UNMANAGED, but I am not an ISV is the short answer. I have written about what’s included, so easy to reverse.
Remember to PUBLISH CHANGES
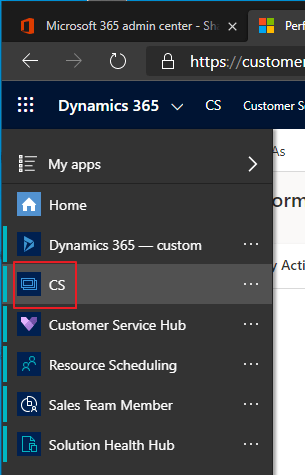
You will now see a new App called CS
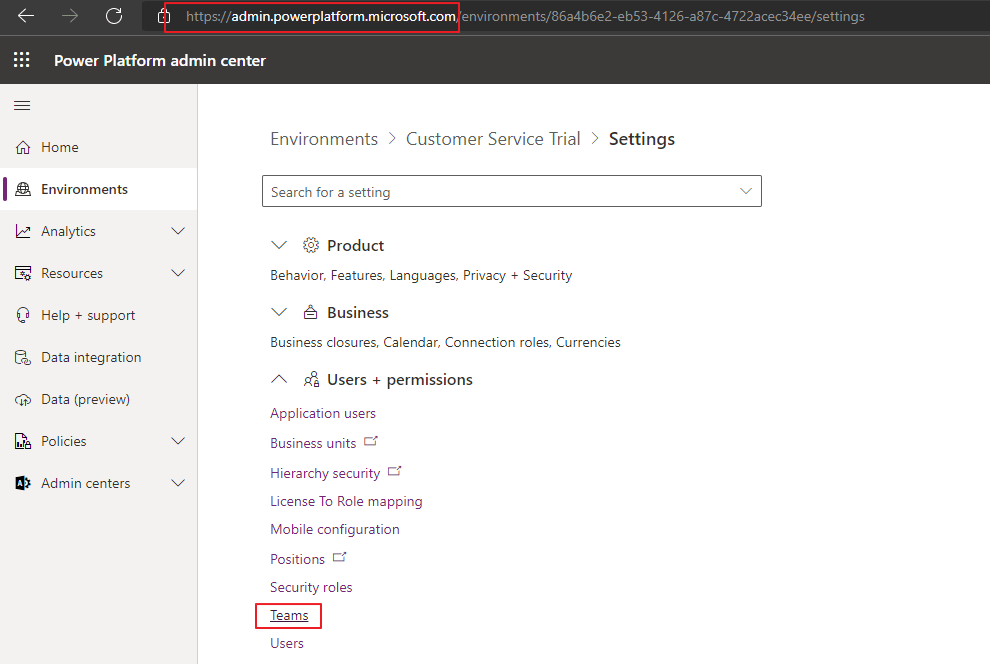
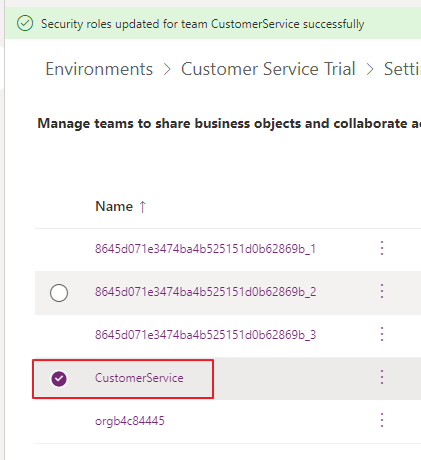
3. Add Team + Security Role
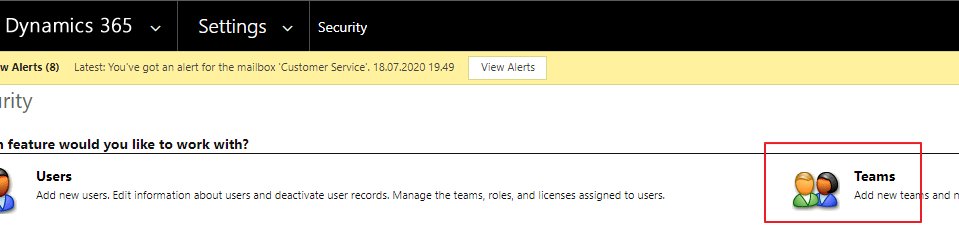
Next you need to add a new team to Dynamics. Open the Advanced Settings in the navigation to the top right. We will be doing the next part in the old client
Open Settings – Security and Team. Add a new team and give it a name. I have chosen Customer Service. This is the team name that will own the Cases before they are assigned.
Also remember to add the security role “Team – Customer Service”. This security role is imported along with the solution
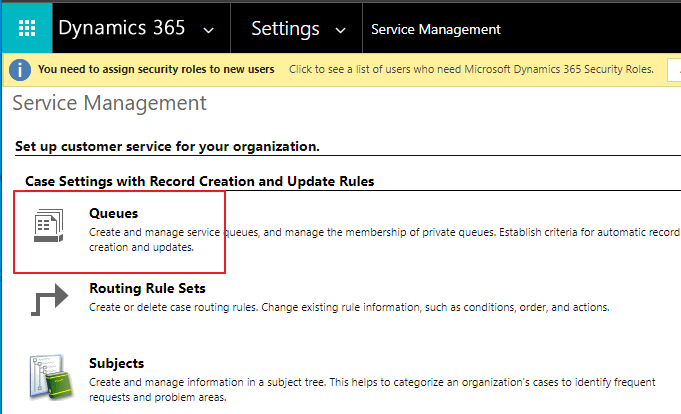
4. Add Queue + assign Team
This is the step where we connect Microsoft Exchange with Dynamics 365
Name of the queue is not important, but make something that is sensible.
When you click save, a new Mailbox will be created automatically by the system. Open the Mailbox, an navigate to the next step.
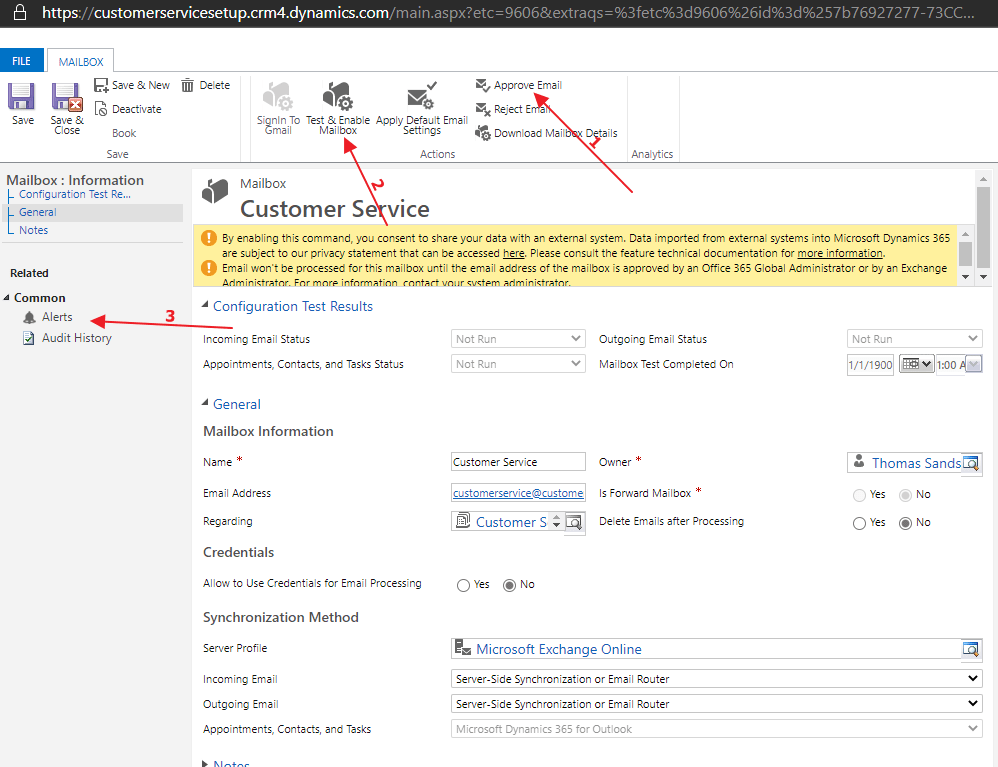
5. Approve Email and test receive mailbox
This is the point where you need to be Global Admin to continue. Start by approving the mailbox/email address.
Step 2 you test and enable the mailbox. Once this is done, head on over to “alerts”
You might need to refresh this a few times before it displays anything. The refresh button in the upper right corner is the easiest way to update the feed. You should only see information messages now. This should not generate any errors.
6. Email Settings
Next step is really important for keeping the subject logic. All of this will make sense later when you see the reply of the emails you send. Open the Email Configuration Settings and make sure it looks just like below.
7. Create Account and Contact
Now we create an Account and Contact that we use for our demo. The Account name can be whatever you want, but the contact needs to have a valid email address.
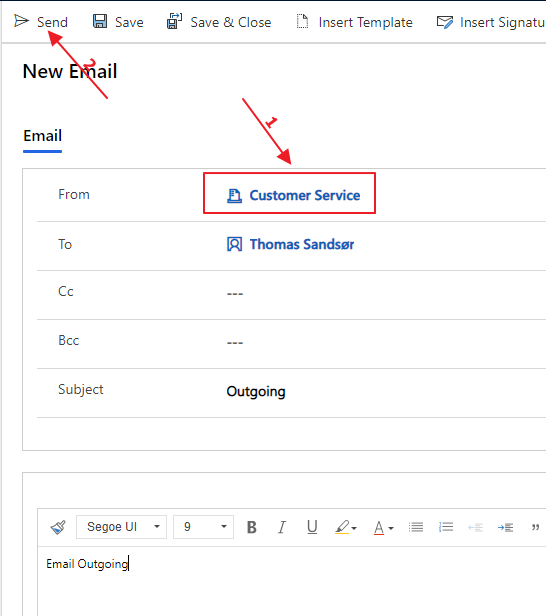
8. Send Test Email Outbound
Now it is important to check that emails actually are going out of the system. Open the contact you created with the valid email address. Create a new email activity.
NB! make sure that you substitute the from address to Customer Service (queue you created earlier) before you hit send. This will send FROM the queue to the Contact.
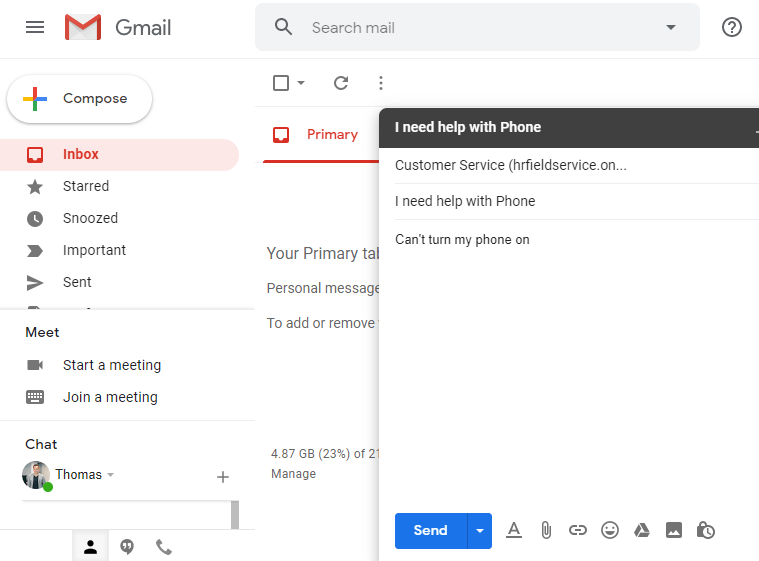
If things go as planned you will see an email appear in the mailbox. Be sure to check you spam if nothing is in the inbox!!!
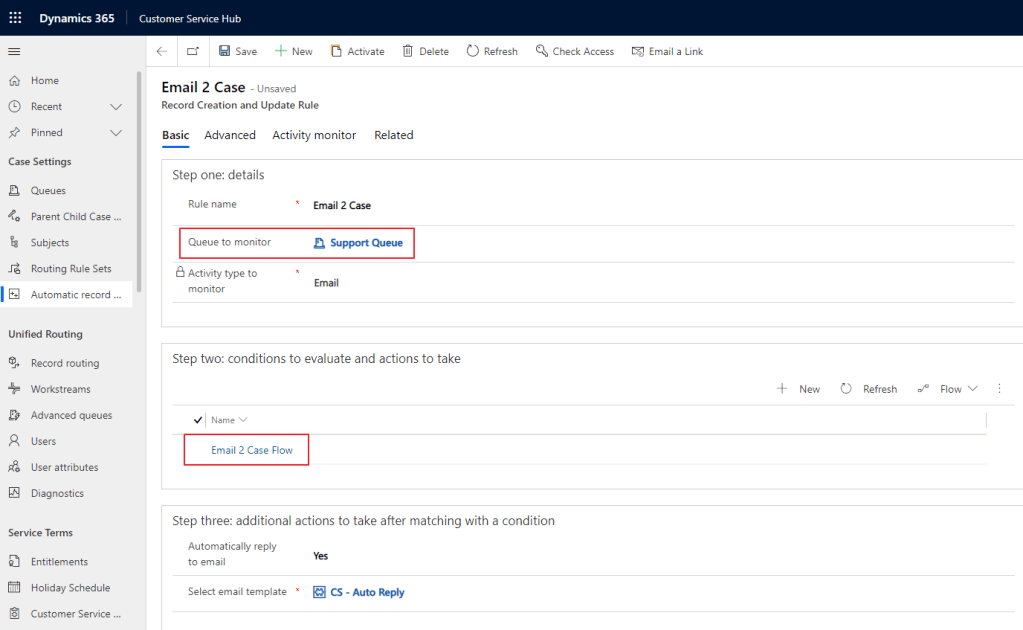
9. Activate Record Creation and Upadte + add Team to Case Created Owner
After importing the solution you will now find “Email 2 Case” in the Automatic Record Creation area. Open this via the Customer Service HUB
Make sure you select your Queue that you have added earlier ADD QUEUE
Open the Email 2 Case Flow to see the structure that Microsoft now has create for Email to Case.
If you like adding the Team as owner to the cases (Optional), you have to add this line to the Owner field in the Flow.
NB! You have to retrieve the GUID from the Team in CRM.
Fining the Team GUID
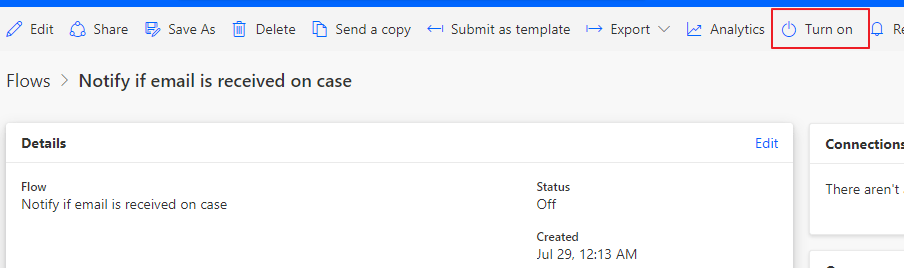
Last step is to Activate the email to case record creation.. At this point you should be able to see emails entering CRM via Cases.
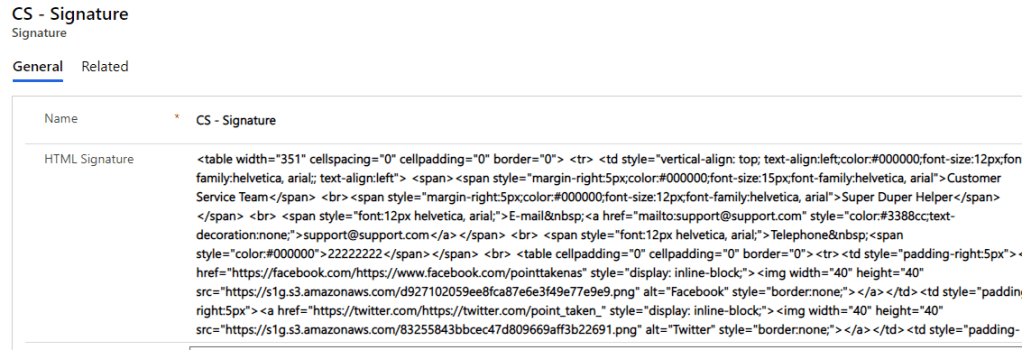
10. Add Signature
Next step we have create a signature for the user. Signatures can be personal or company specific. The signature is located under the setup section. Navigation is at the bottom left of the CS app.
The signature below is HTML. I don’t expect you do this from scratch. I have a great guide here
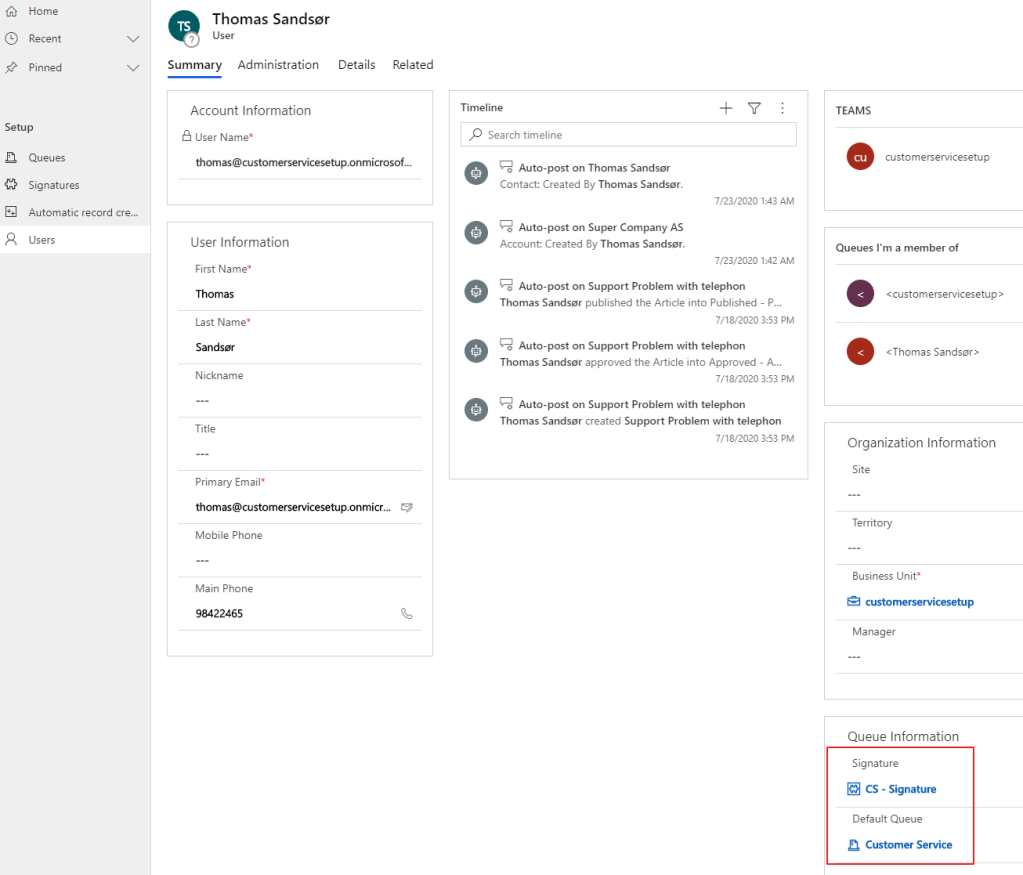
11. Add User with Signature and Default Queue
Getting close to the end now, we have to add all our hard work to the Customer Service User replying to the emails. In the user form you see 2 fields “Signature” and “Default Queue”.
Update with the queue you created earlier, and the signature you just created. This is what will defines what the email leaving the system will look like.
12. Add Email Warning – New Activity on Case
This last step is optional. I created it in Flow, so beware of possible hitches with a few things regarding the current environment connector.
The purpose is to notify the Agent that a new Email has arrived for the case. If for some reason the system received email to a close case, I reopen the case and notify the agent.
This post is a part of a series of posts for Customer Service. The complete GUIDE can be found here
Before we complete it all I will clean the form a bit. The demo I will be focusing on is the B2B space. If you use the B2C part of support, you might not need any of this. Just continue to the next post:)
Before
It looks good out of the box, but it doesn’t provide a great amount of value.
Business Process Flow on the top of this case is close to useless. It only indicates that you can have a process that looks nice. The steps don’t make sense, and as always with BPF…. You can’t create a step without a mandatory field present. 😒
The first quick view shows a view of the company information. It takes up a lot of space, and in my opinion displays relatively irrelevant information about the customer. If you want quick info about customer, you can “hover over” the customer field.
The right side is setup with reference panels. I wrote an article about loving them a while back, but Customers seem to prefer normal subgrids when actually navigating. Recent Cases is actually just a quick view, and that doesn’t do us much good. Try opening one of the cases, and you won’t see much. We will have to clean this up for it to actually work. We will also remove entitlements, because it’s too much of a hassle in a simple Customer Service scenario.
I hide the tabs on top for now, because I simply don’t need them. If at one point you want to expand, you can reintroduce them.
Subjects.. Are they staying or going. I am not sure what the future holds for this. It’s quite confusing. At some parts of history it seemed very central for Customer Service and Knowledge Articles. Then Categories came along. I would like some clear information what is what. For simplicity I will use subjects for demo. Personally not to happy about it.
The customer field here is as confusing at the customer field was originally for Opportunity. If you are using Customer Service for B2B this has to be linked to an account and not contact. If you use B2C I guess you can just leave it and never really see it as a problem. In my cases I always have to change this to store Account, and then use the Contact field for Contact. Opportunity has managed to change from Customer field to Account & Contact. Don’t see why Case can’t do the same…
Cleanup
1. BPF – Business Process Flow removal
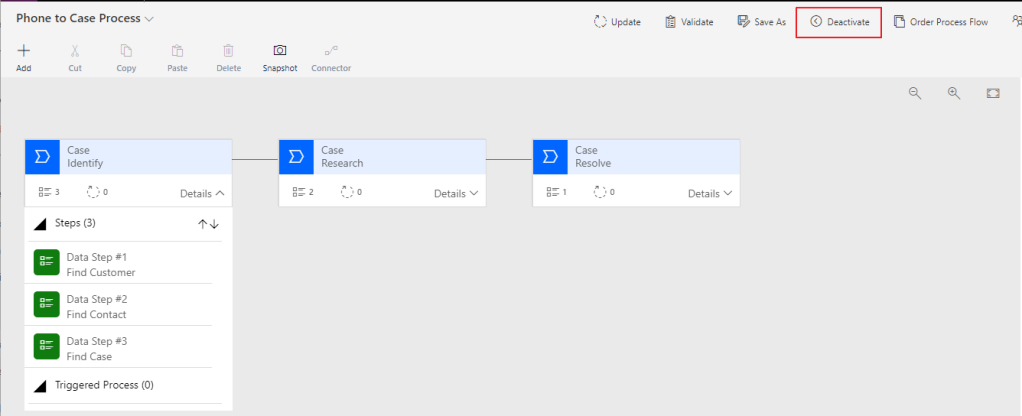
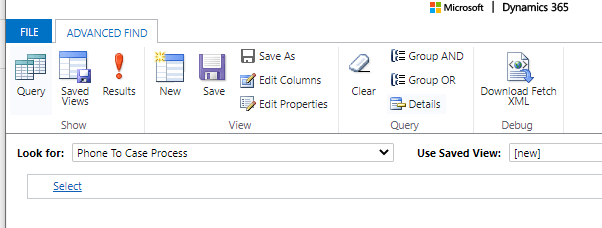
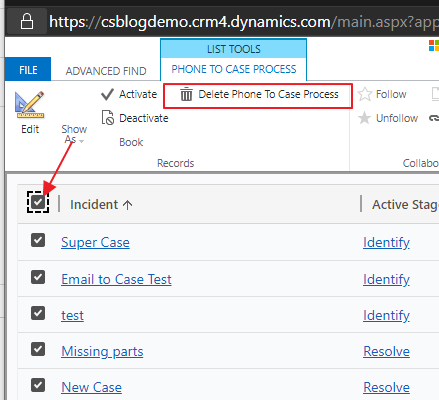
Start off by deactivating the BPF from customization. Then we have to delete all records of the process running. Open Advanced Find, and look for the table that has the same name as the Business Process Flow
PS: If you happen to have a demo setup, it might also include Field Service demo data. Then you have to repeat the process for “Case to Work Order Business Process”.
2. Quick View
Does not give any extra added value. I am replacing this function with a similar value, but different way of working. I open in form editor and remove.
3. Remove Entitlements in Reference Panel
First make sure to remove the Entitlements
Then make sure that the view is set to Recent Cases. Don’t trust that the name of the subgrid is correct. You actually have to make sure that you have the Recent Cases view here.
Create a new section for Recent Cases, and move the Recent Cases out of the Reference Panel. This way we can actually click on a case and open it from the Quick View.
4. Hide tabs
Just hide it. Don’t need it for now
5. Fix Customer field – B2B scenario
In the B2B scenario we need to make a few adjustments to the customer field, and add some onload logic for the agent. In the B2B scenario we need the customer data to be good, and therefore we can’t accept cases where the contact is unknown.
Let’s just agree that this doesn’t look very exciting, but it does the job. It does the job quite well!
This is how I want it to look. I have hidden a bunch of components that Microsoft includes as standard Customer Service. Normally it is just a little too much. This will lead to an easy training and a simple customer service view for the agent.
Removing the Business process flow we loose a lot of colors, but this is for actual production. Not a fancy demo to excite someone buying.
This post is a part of a series of posts for Customer Service. The complete GUIDE can be found here
Many years ago Opportunity retired the Customer field and replaced it with Primary Contact and Primary Account fields. Case has not yet done this for reasons I can’t really understand. As you will see in this article we achieve the same result when adding the contact field, but the customer field is still a polymorphic lookup.
Email to Case could easily add to the contact field instead of the customer field. Field service is actually dependent on account being in the customer field for it to work properly.
This is how Case has to be setup to make sense in the B2B world:
If the Contact and Customer are known to the system, they will automatically populate. If the Contact is new to the system, the connection to the Account will be missing. In this case we need to alert the Agent, and ask them to update the contact record.
JavaScript
The following JavaScript is added to the Case form. It checks the Customer field to see if it is contact. If this is the case, it will check if the Contact has a Account connected. Most likely it will not have an Account, so we will be prompted “Do you wish to update the Contact?”. Answer YES here, and a quick view of the Contact will appear. Update Account, and then the JavaScript will do the rest for you. ✨MAGIC✨
var formContext = "";

function OnCrmPageLoad(executionContext) {
    formContext = executionContext.getFormContext();

    //
    //You don't need to change this. Just understand that forms have one the following states when opening
    //
    var FormTypes =
    {
        Undefined: 0,
        Create: 1,
        Update: 2,
        ReadOnly: 3,
        Disabled: 4,
        QuickCreate: 5,
        BulkEdit: 6
    }
    runAlways(formContext);
    switch (formContext.ui.getFormType()) {
        case FormTypes.Create: OnNewFormLoad(); break;
        case FormTypes.Update: OnUpdateFormLoad(); break;
        case FormTypes.ReadOnly: OnReadOnlyFormLoad(); break;
        case FormTypes.Disabled: OnDisabledFormLoad(); break;
        case FormTypes.QuickCreate: OnQuickCreateFormLoad(); break;
        case FormTypes.BulkEdit: OnBulkEditFormLoad(); break;
        case FormTypes.Undefined: alert("Error"); break;
    }
}

//
//I only use the RunAlways, OnNewFormLoad and OnUpdateFormLoad, but i keep the others here if i ever would need.
//When looking at this you can always know what funtion is running. Easy to read and debug.
//
function runAlways() { }
function OnNewFormLoad() {}
function OnUpdateFormLoad() {
    //
    //Clean up Contact Data. If contact has account, but account not in Customer field perform update. If Contact doen's have account ask for update
    //
    GetAccountInfo();
}
function OnReadOnlyFormLoad() { }
function OnDisabledFormLoad() { }
function OnQuickCreateFormLoad() { }
function OnBulkEditFormLoad() { }


//******************************************************************** */
//CUSTOM FUNCTIONS are added below here. Below this point you add all types of functions you need.
//******************************************************************** */
function GetAccountInfo() {
    var CustomerField = formContext.getAttribute("customerid").getValue();
    if (CustomerField != null) {
        if (CustomerField[0].entityType == "contact") {
            var CustomerGUID = CustomerField[0].id;
            CustomerGUID = CustomerGUID.replace("{", "");
            CustomerGUID = CustomerGUID.replace("}", "");

            //
            //If the Customer Field contains a contact, I want to change this. I want the Customer Field to be an account. Step 1 is to find out if the contact has account registered.
            //
            Xrm.WebApi.online.retrieveRecord("contact", CustomerGUID, "?$select=_parentcustomerid_value").then(
                function success(result) {
                    var Id = "{" + result["_parentcustomerid_value"] + "}";
                    var Name = result["_parentcustomerid_value@OData.Community.Display.V1.FormattedValue"];
                    var LogicalName = result["_parentcustomerid_value@Microsoft.Dynamics.CRM.lookuplogicalname"];

                    //
                    //IF the contact has an account I move the Contact to Case Contact, and receive the Account from the Contact and enter it to Customer on Case.
                    //
                    if (LogicalName != null){
                        formContext.getAttribute("primarycontactid").setValue(CustomerField);
                        formContext.getAttribute("customerid").setValue([{ id: Id, name: Name, entityType: LogicalName }]);
                        formContext.data.entity.save();
                    }else{
                        //
                        //Promt if you want to open contact for update?
                        //https://carldesouza.com/how-to-implement-javascript-confirmation-dialogs-in-power-apps-and-dynamics-365/ - THANK YOU
                        //
                        var confirmStrings = { text:"Contact is not connected to Account. Please update!", title:"Data Update Recommended", confirmButtonLabel:"Open Contact", cancelButtonLabel: "Not Now" };
                        var confirmOptions = { height: 200, width: 450 };
                        Xrm.Navigation.openConfirmDialog(confirmStrings, confirmOptions).then(
                        function (success) {
                            if (success.confirmed){
                                //
                                //If the user chooses to update, I open a small contact form, and make the user set the Account.
                                //After Save&Close i recall this function, and then I update Account and Contact for case.
                                //
                                Xrm.Navigation.navigateTo({pageType:"entityrecord", entityName:"contact", formType:2, formId:"e4206691-b1e3-4e9d-a23a-4865b9511091", entityId:CustomerGUID}, {target: 2, position: 1, width: {value: 20, unit:"%"},height: {value: 50, unit:"%"}}).then(
                                    function success() {
                                        GetAccountInfo();
                                    },
                                    function error() {
                                        alert("The system was not able to save the change. Please reload the page and try again");
                                    }
                                );
                            }else{
                                //Say or do something if the user doesn't update Contact
                            }
                        });

                    }
                },
                function (error) {
                    Xrm.Utility.alertDialog(error.message);
                }
            );

        }
    }

}
He created a PCF component for quick updating related entities without having to leave the record.
Updating related LOOKUP
Internally we have all of our active projects in a list. For every project we have a customer contact registered for continuous surveys (Power Automate, Forms Pro, SMS.. Cool Stuff). For the system to work correctly we need to make sure we have both the phone number and email address updated at any given time for the automated surveys to work.